10 Common Sofa Problems & Easy Fixes
Stop ignoring that annoying squeak or sagging cushion. Learn exactly how to diagnose and fix the most frequent sofa issues — and save hundreds in repair costs.
JUMP TO PROBLEMSYour sofa is the most used piece of furniture in your home. Over time, even high-quality sofas develop problems — cushions lose their shape, frames start making noise, and upholstery shows wear. The good news? Most common sofa issues don't require a professional. With the right approach and a few basic tools, you can fix them yourself.
This guide covers the 10 most common sofa problems homeowners face, with clear causes, step-by-step fixes, and prevention tips for each one. Whether you're dealing with a sagging seat cushion, a squeaky frame, or lingering odors, you'll find a practical solution here. Understanding these problems also helps you evaluate sofa quality before your next purchase.
Quick Navigation — Jump to Any Problem
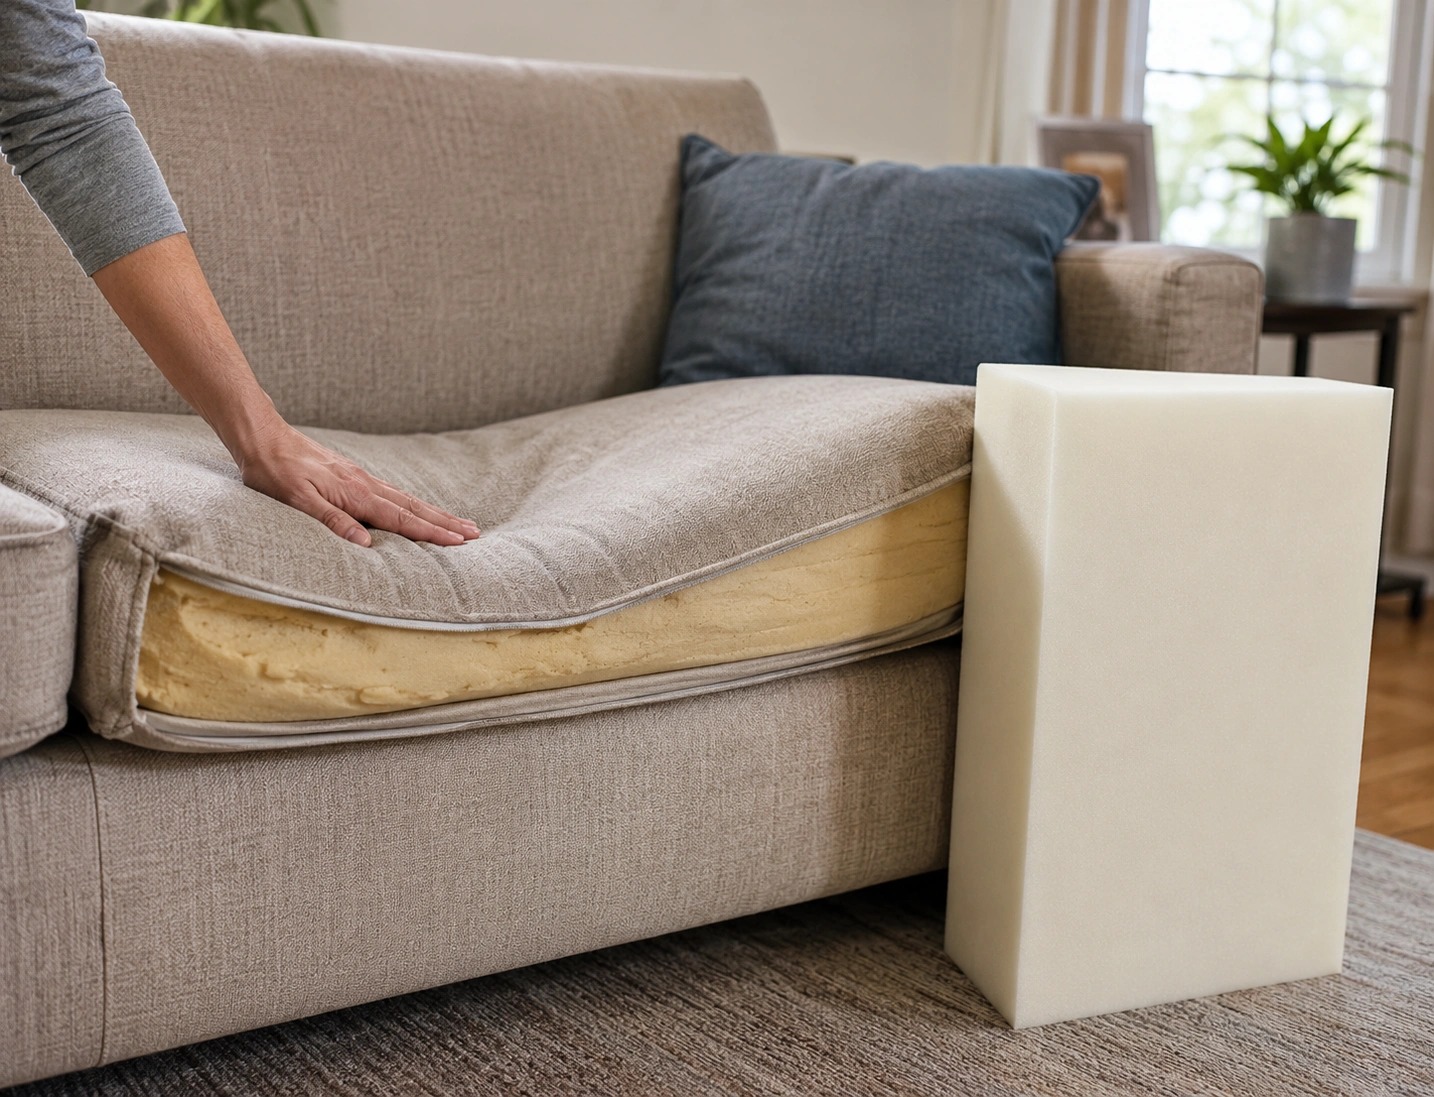
1. Sagging Seat Cushions
The most widespread sofa complaint. Cushions that once felt supportive now sink when you sit, creating an uncomfortable dip that makes the sofa look worn out and feel unsupportive — especially in the center seat where weight concentrates most.
Common Causes
- Low-density foam that breaks down after 2–3 years of daily use
- Compressed polyester wrap or batting losing its loft
- Weak or stretched suspension system (sinuous springs or webbing) underneath
- Uneven weight distribution — always sitting in the same spot
Tools & Materials Needed
- High-density foam insert (2.0–2.5 lb density recommended)
- Polyester batting wrap
- Upholstery zipper or sewing kit
- Staple gun (for base repairs)
Step-by-Step Fix
- Remove the cushion cover by unzipping it or carefully opening the seam with a seam ripper.
- Inspect the existing foam — if it's crumbly or has permanent indentations, it needs full replacement. If it still has structure, adding a foam topper may suffice.
- Cut a new foam insert to match the exact dimensions of the old one. Use an electric carving knife for clean edges — choose foam with a density rating of 2.0 or higher for lasting support.
- Wrap the new foam in polyester batting to restore that plush, rounded appearance.
- Insert the wrapped foam back into the cushion cover and zip or sew it closed.
- Flip and rotate cushions weekly to ensure even wear across all seats.
Prevention
- Rotate and flip seat cushions every 1–2 weeks
- Avoid sitting in the exact same spot every day
- Don't stand or kneel on cushions
- Choose sofas with reversible cushions for double-sided wear
2. Squeaky Frame & Joints
That irritating creak every time you shift position. Squeaks usually come from loose joints where wooden frame parts connect, or from metal springs rubbing against each other or the frame. Left unchecked, loose joints can lead to structural failure.
Common Causes
- Wood-on-wood friction at joints that have loosened over time
- Missing or dried-out glue at dowel and mortise-and-tenon joints
- Metal springs rubbing against the wooden frame or each other
- Loose screws or bolts in knock-down (KD) furniture joints
Tools & Materials Needed
- Wood glue (PVA or polyurethane)
- Bar clamps or pipe clamps
- Screwdriver set (Phillips and flathead)
- WD-40 or silicone spray lubricant
- Furniture felt pads
Step-by-Step Fix
- Flip the sofa upside down and remove the dust cover (the black fabric underneath) using a staple remover or flathead screwdriver.
- Have someone sit on the sofa while you listen underneath to pinpoint the exact squeak location.
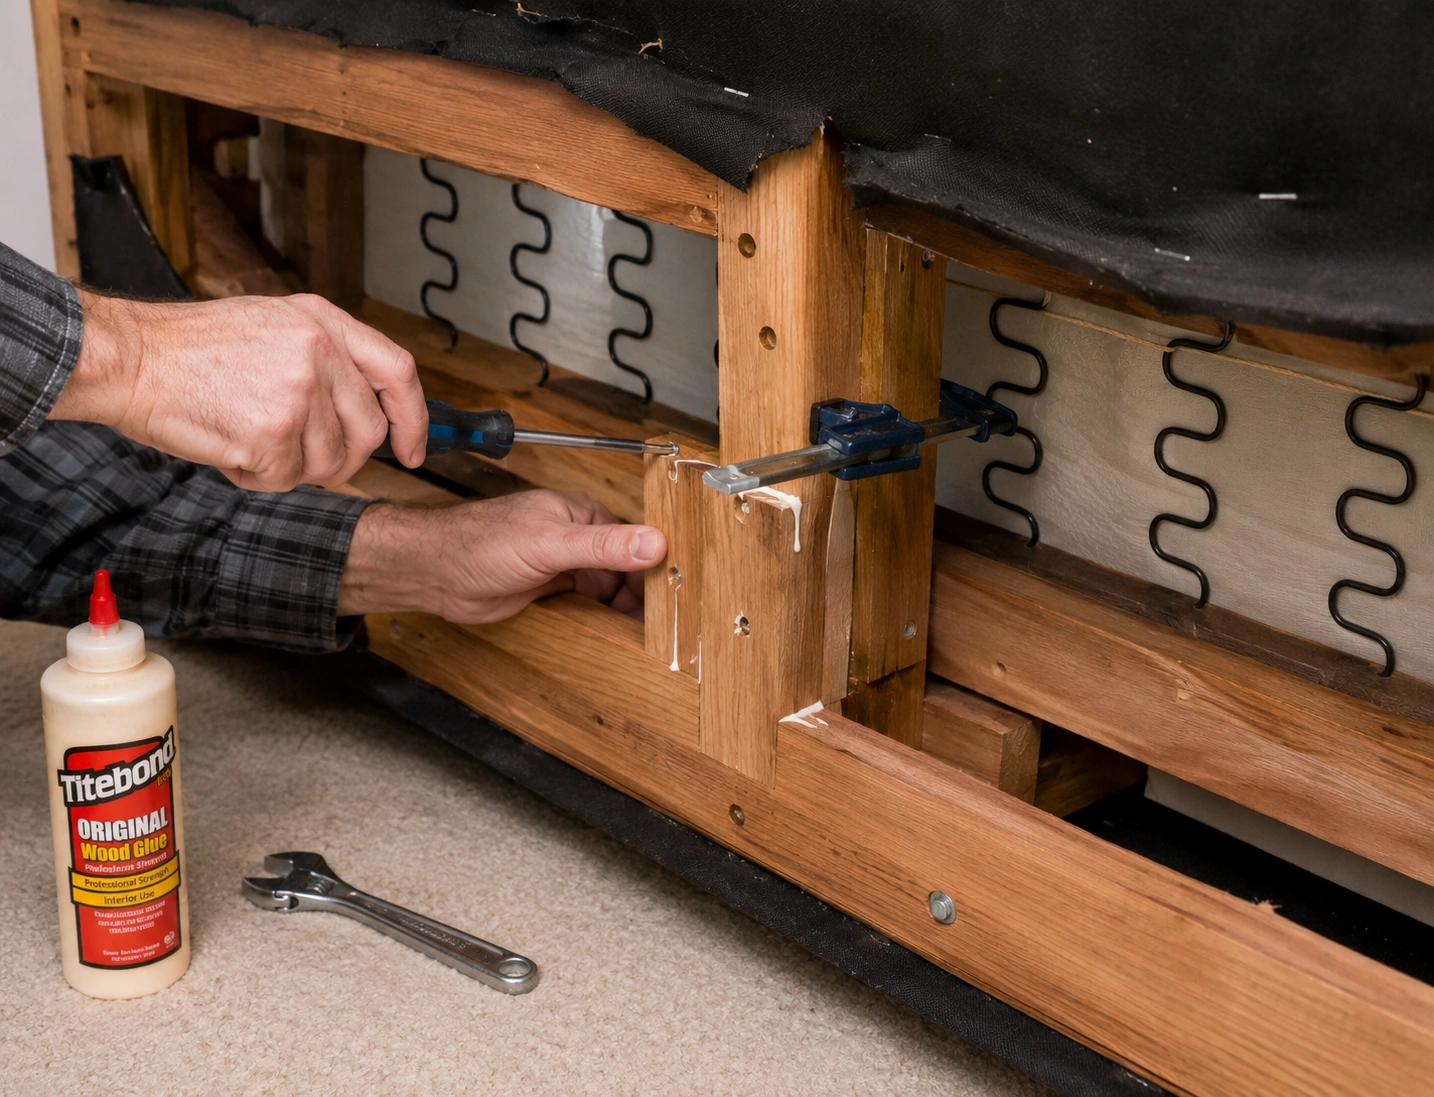
- For loose wood joints: Apply wood glue to the joint, clamp it tightly, and let it cure for at least 24 hours. For extra strength, add a small wood screw through the joint after gluing.
- For loose screws and bolts: Tighten all visible fasteners. If a screw hole is stripped, fill it with a wooden toothpick coated in glue, let it dry, then re-drive the screw.
- For spring squeaks: Apply a small amount of silicone spray where springs contact the frame. Avoid over-spraying — it can attract dust.
- Reattach the dust cover with a staple gun and test the sofa before flipping it back.
Prevention
- Periodically tighten all frame screws and bolts (every 6 months)
- Avoid jumping on the sofa or placing excessive dynamic loads
- Choose sofas with kiln-dried hardwood frames — they resist warping and joint loosening far better than softwood or particle board
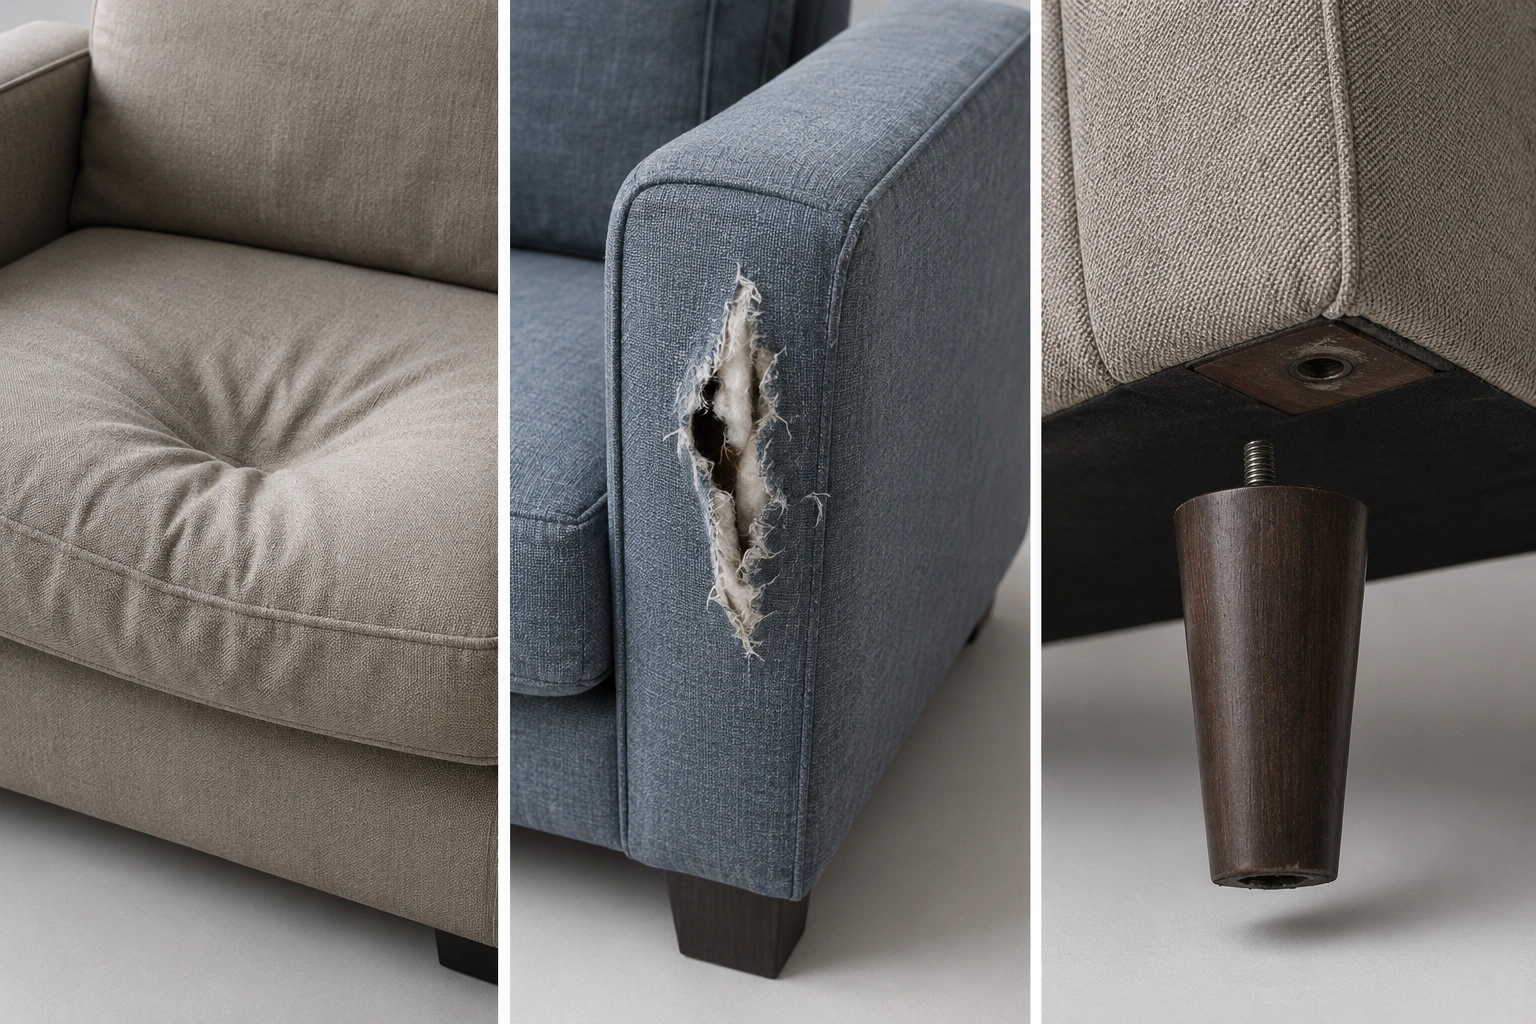
3. Torn or Worn Upholstery
Rips from pet claws, snags from jewelry, or general thinning of fabric in high-wear areas like armrests and seat edges. Tears worsen quickly with use, so prompt repair is essential to prevent the damage from spreading.
Common Causes
- Pet claws snagging the fabric surface
- Sharp objects (keys, belt buckles, zippers) catching on the material
- Friction wear on armrests and edges from repeated use
- Fabric with low Martindale rub count that isn't suited for heavy use
Tools & Materials Needed
- Heavy-duty upholstery needle and strong thread
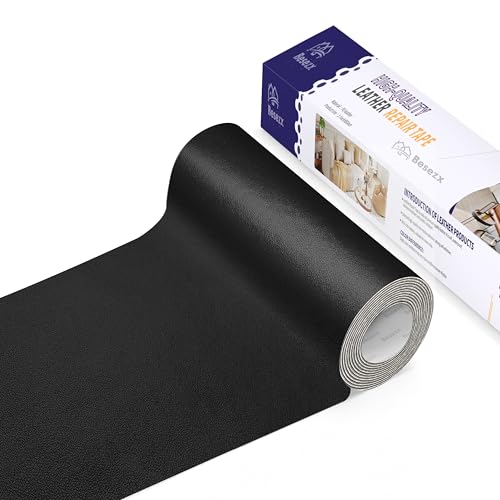
- Fabric adhesive or iron-on patch
- Scrap fabric from hidden area (for invisible patching)
- Iron (for heat-activated patches)
Step-by-Step Fix
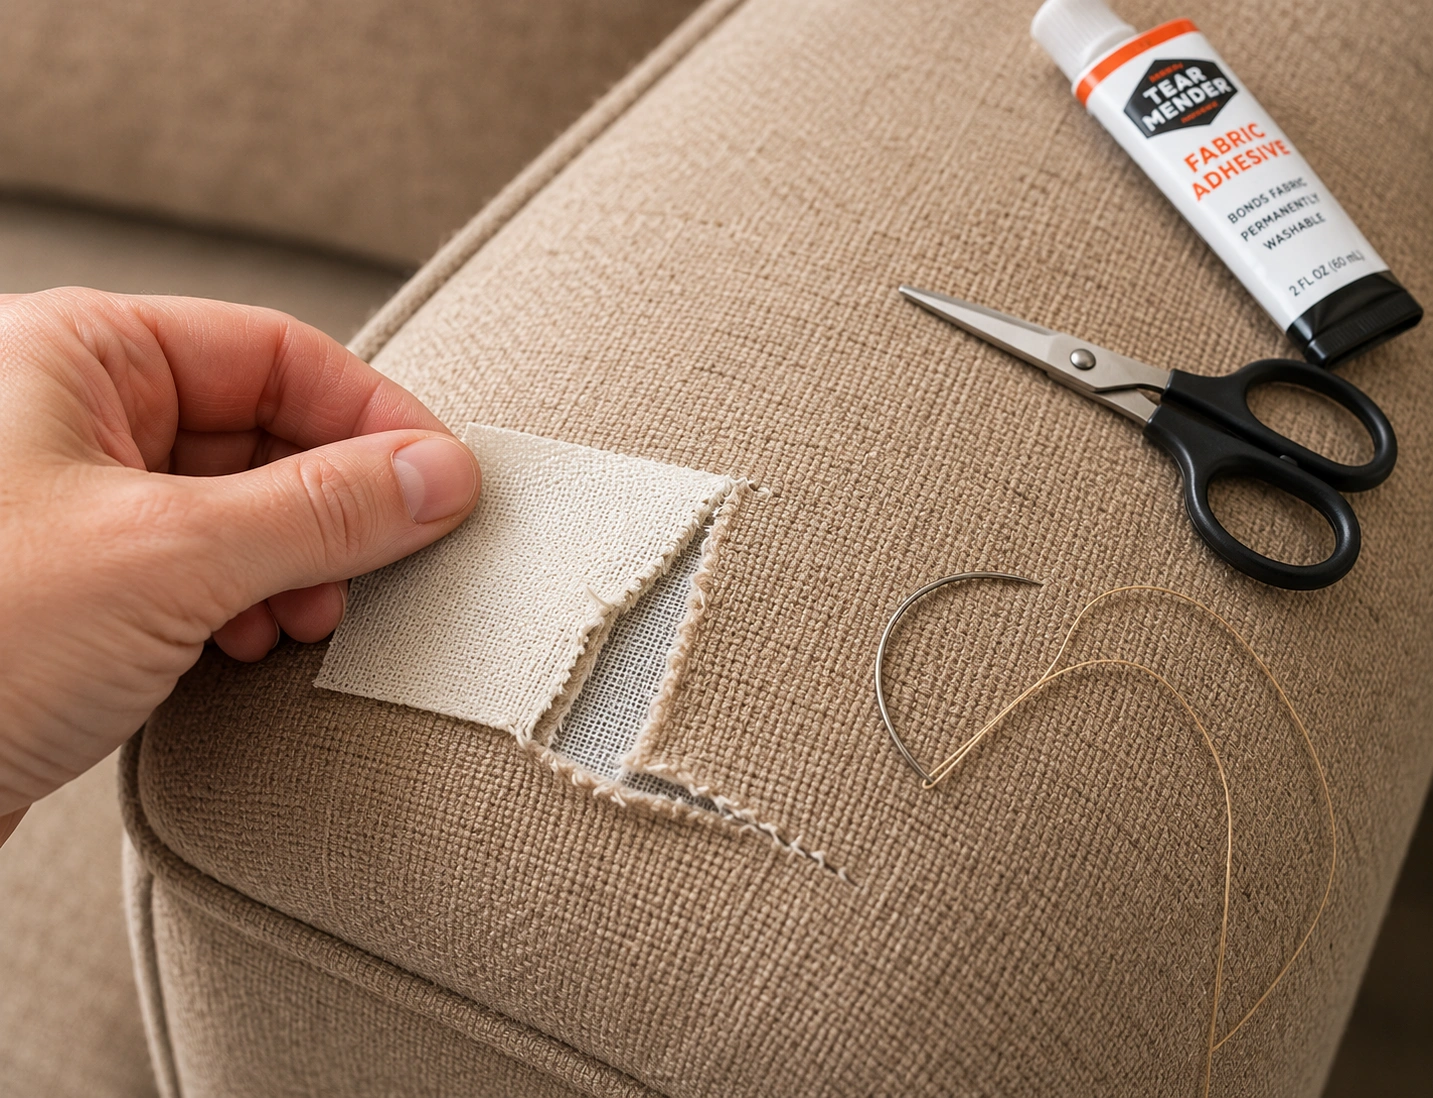
- For small tears (under 2 inches): Gently pull the edges of the tear together. Using a curved upholstery needle and heavy thread, make small, even stitches along the tear, keeping the fabric as flat as possible. Knot securely on the underside.
- For medium tears: Cut an iron-on patch slightly larger than the tear. Slide it between the torn fabric and the cushion/lining. Apply heat with an iron (follow patch instructions) to bond it. The patch stabilizes the tear and prevents further spreading.
- For large tears or pet damage: Cut a patch from scrap fabric taken from an inconspicuous area (like the bottom edge of the sofa skirt or under the cushion). Pin it over the tear, then sew it in place using a whip stitch. For a cleaner look, consider using a sofa cover or slipcover to hide the repair entirely.
- After any repair, apply a small amount of fabric protector spray to the repaired area to strengthen the fibers.
Prevention
- Trim pet nails regularly and provide alternative scratching surfaces
- Apply fabric protection spray after every deep clean
- Choose high Martindale-rated fabrics (25,000+ rubs) for family use
- Use armrest covers and throws on high-traffic spots
4. Loose or Wobbly Legs
Your sofa rocks unevenly or one leg feels loose when you sit near the edge. Beyond being annoying, wobbly legs put uneven stress on the frame joints and can accelerate structural damage to the entire sofa.
Common Causes
- Loose mounting bolts or screws connecting legs to the frame
- Stripped screw holes in the wooden frame
- Uneven floor surface beneath the sofa
- Worn-out threaded inserts in metal legs
Step-by-Step Fix
- Flip the sofa onto its back carefully (get help — sofas are heavy).
- Check each leg individually by wiggling it. Identify which legs are loose.
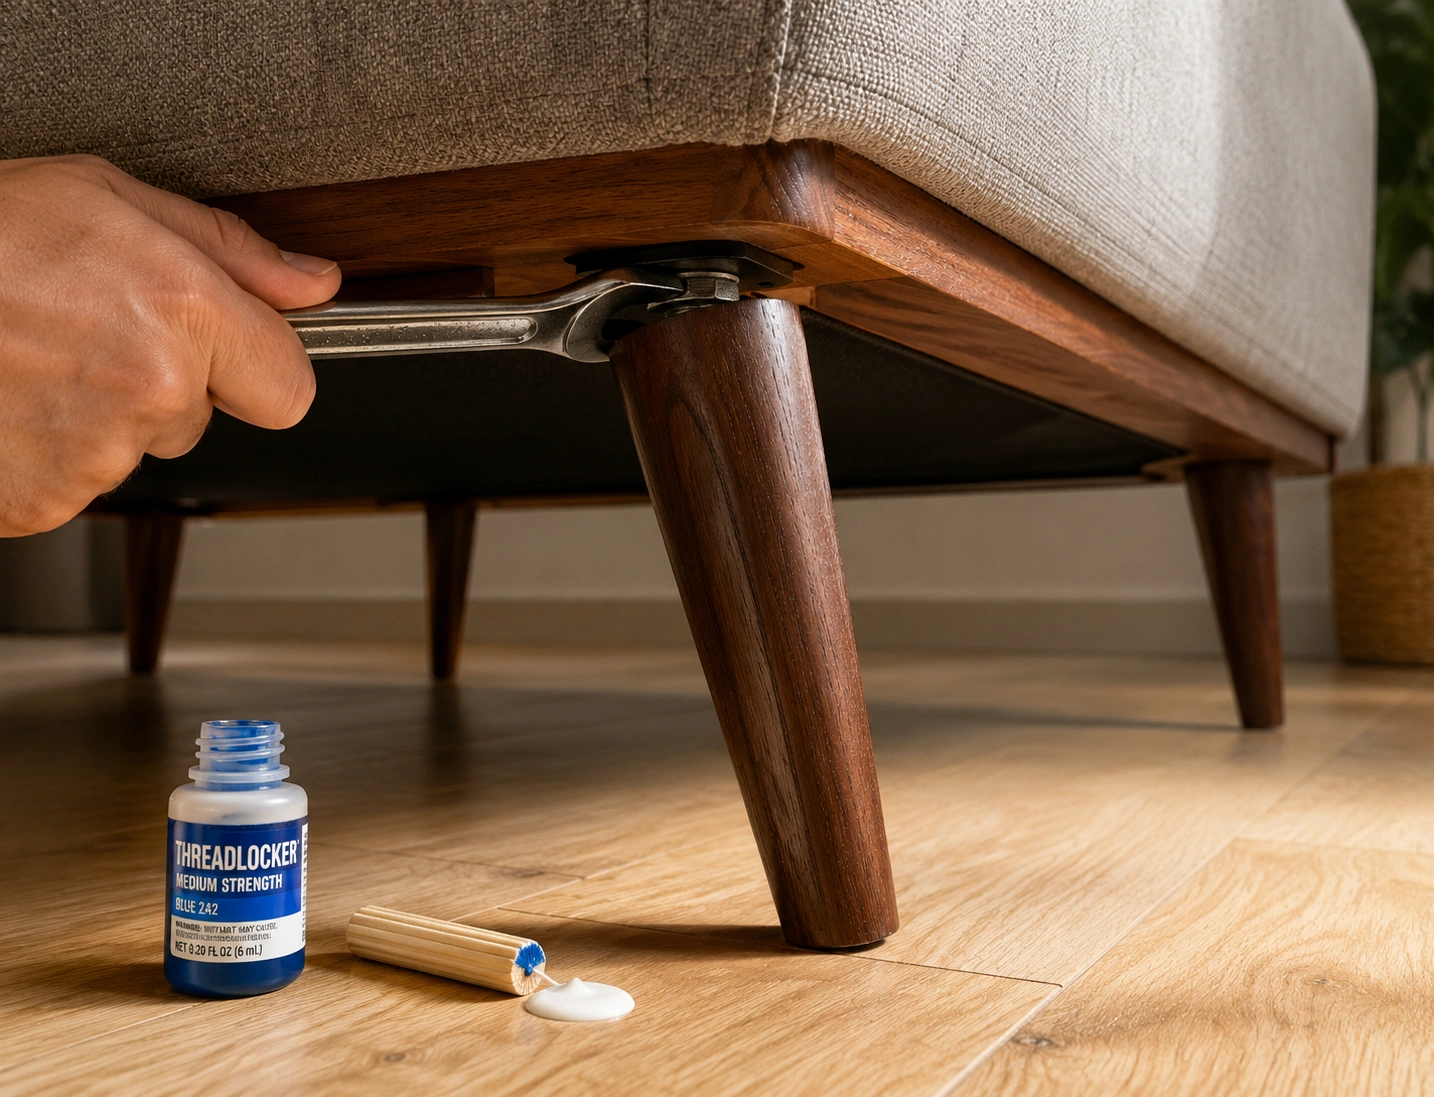
- For simple loose bolts: Tighten with the appropriate wrench or screwdriver. Apply thread-locking compound (like Loctite) to prevent future loosening.
- For stripped holes: Fill the hole with a wooden dowel coated in wood glue. Let it dry completely (overnight), then drill a new pilot hole and re-drive the screw.
- For uneven floors: Add adjustable furniture levelers or adhesive felt pads to the short leg(s) until the sofa sits flat.
- Place the sofa upright on a flat surface and test all four corners for stability.
Prevention
- Tighten leg bolts during your bi-annual sofa maintenance check
- Avoid dragging the sofa — lift it when moving to prevent leg stress
- Use furniture coasters on carpet to distribute weight evenly
5. Stubborn Stains & Spills
Coffee, wine, pet accidents, ink, and food grease can permanently mark your sofa if not treated quickly. The key factor is always timing — but even set-in stains can often be removed with the right technique for your specific fabric type.
Common Causes
- Spills not blotted immediately, allowing liquid to penetrate fibers
- Using the wrong cleaning agent for the fabric type (e.g., water on "S" coded fabric)
- Scrubbing stains instead of blotting, which spreads and sets them
- Grease and body oils accumulating over months without deep cleaning
Step-by-Step Fix
- Check the care tag first. "W" means water-based cleaning is safe. "S" means solvent-only. "WS" means either. "X" means professional cleaning only — do not attempt DIY.
- For fresh spills: Immediately blot (never rub) with a clean white cloth to absorb as much liquid as possible. Work from the outside of the stain inward to prevent spreading.
- For fabric sofas ("W" or "WS"): Mix 1 teaspoon of mild dish soap with 1 cup of warm water. Dab the solution onto the stain with a cloth, wait 5 minutes, then blot with a clean damp cloth. Repeat until the stain lifts.
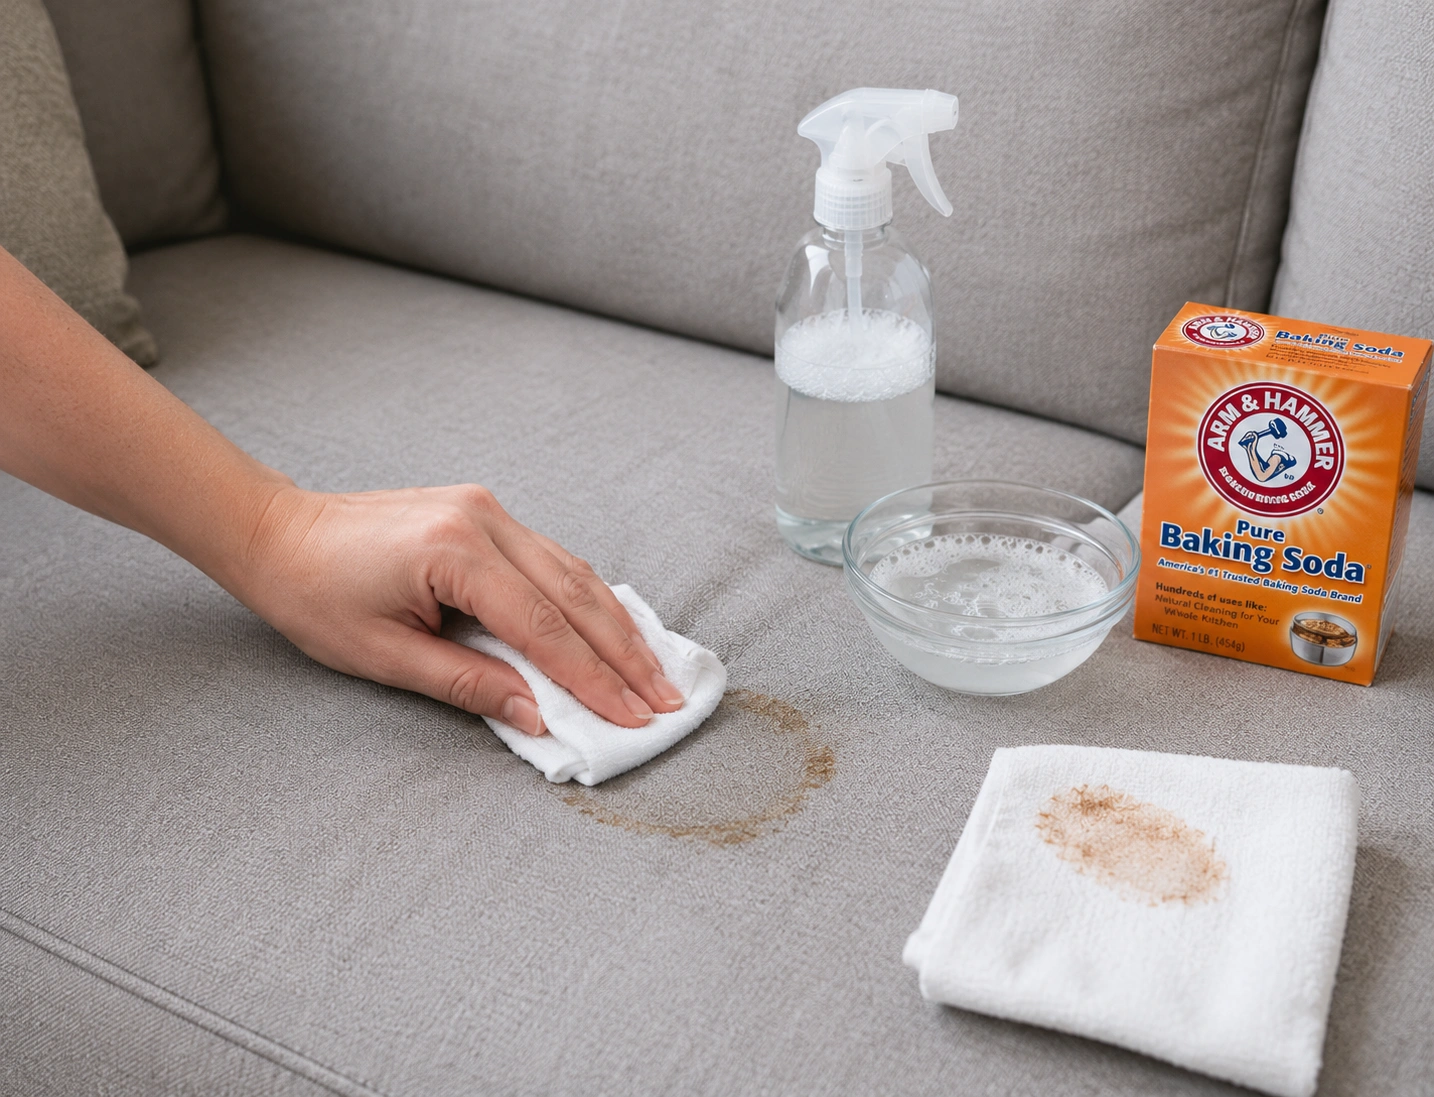
- For grease stains: Sprinkle cornstarch or baking soda over the stain, let it sit for 15 minutes to absorb the oil, then vacuum it up. Follow with a mild soap solution.
- For ink stains: Apply rubbing alcohol to a cotton ball and dab gently. Do not saturate the fabric.
- For leather sofas: Use a dedicated leather cleaner — never use household cleaners or excess water, which can damage the finish.
- Blot the area with a clean damp cloth to remove any cleaning residue, then pat dry with a towel.
Prevention
- Apply fabric protection spray immediately after purchase and after every deep clean
- Establish a "no food/drink" rule or use lap trays
- Blot spills within 30 seconds — set a mental timer
- Schedule professional deep cleaning every 12–18 months
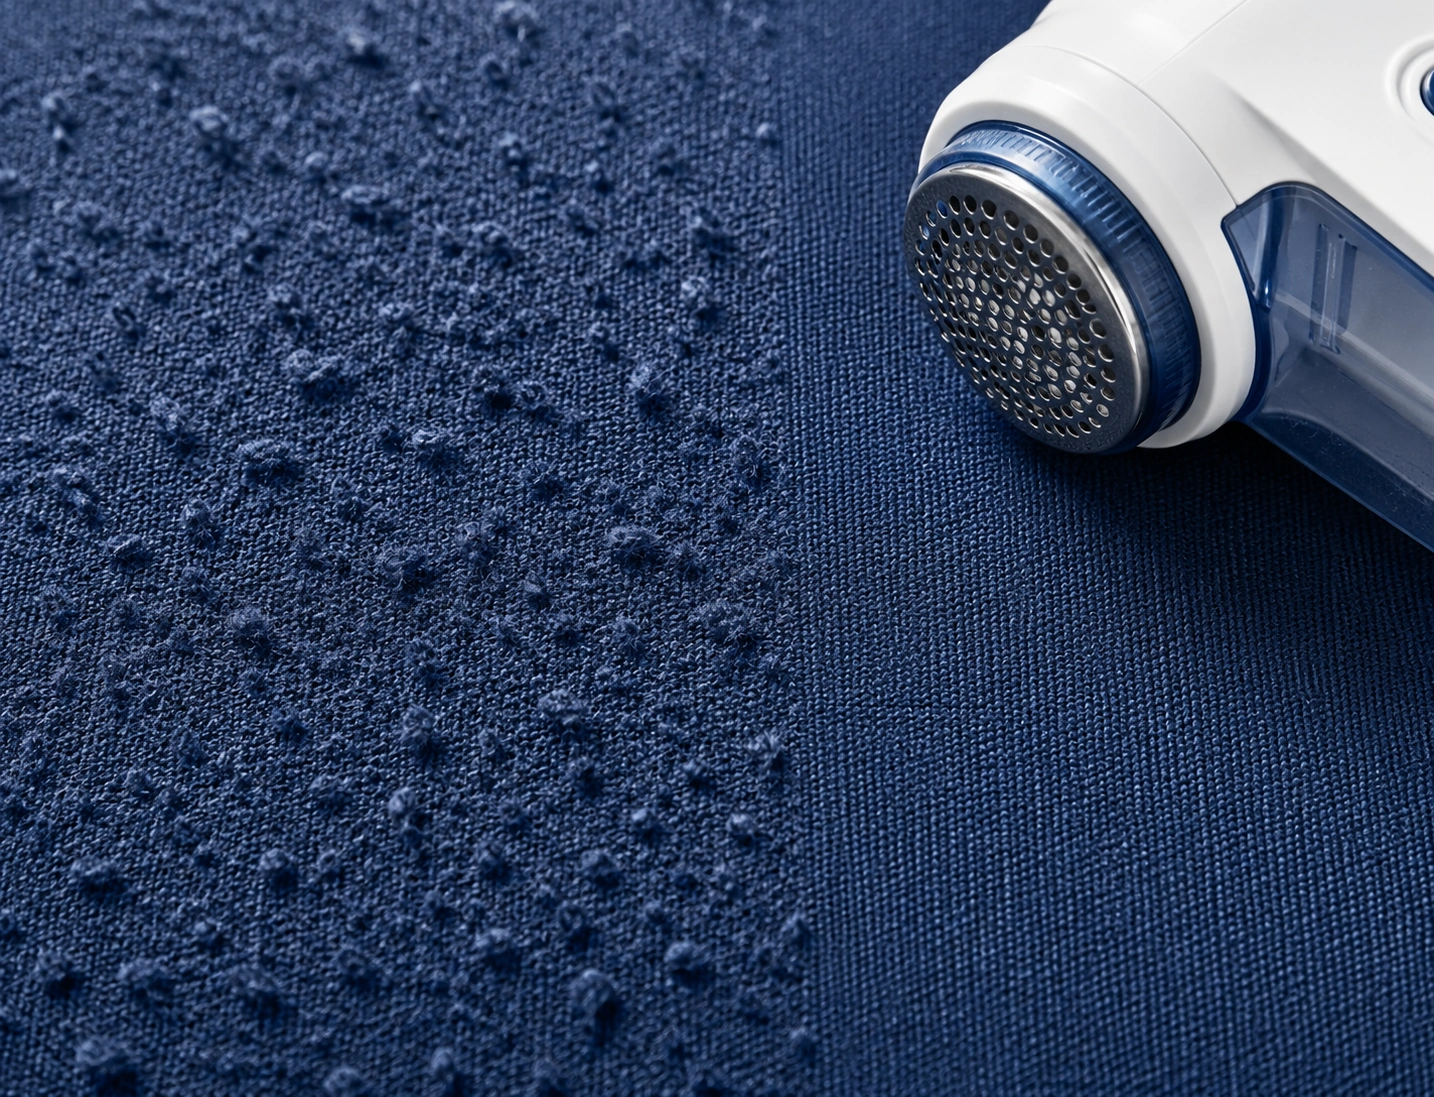
6. Fabric Pilling (Those Annoying Little Balls)
Small, fuzzy balls of tangled fibers form on the fabric surface, making your sofa look old and unkempt. Pilling is extremely common and affects both inexpensive and premium fabrics — it's a characteristic of the fiber blend, not necessarily a sign of poor quality.
Common Causes
- Fiber blends where strong fibers (like polyester) break free from weaker ones (like cotton or wool)
- Friction from sitting, sliding, or rubbing against the fabric
- Washing cushion covers incorrectly (if removable)
- Low-twist yarns that are more prone to fiber migration
Step-by-Step Fix
- Use a fabric shaver (electric pill remover): This is the fastest and most effective method. Run the shaver gently over pilled areas in one direction. Don't press too hard — you don't want to thin the fabric.
- Use a lint roller or fabric comb: For light pilling, a sticky lint roller can pull off loose pills. A fabric comb works by catching and cutting pills in one stroke.
- Hand-picking method: For delicate fabrics, carefully pull pills off by hand or use small scissors to snip them at the base.
- After removing pills, vacuum the fabric with an upholstery attachment to remove loose fibers.
- Repeat as needed — pilling will eventually slow down as the loose fibers are all removed. Most fabrics stop pilling significantly after the first few cleanings.
Prevention
- Choose 100% single-fiber fabrics (all-cotton, all-polyester) over blends when possible
- Look for high-twist yarn fabrics — they resist pilling significantly
- Wash removable covers inside out on a gentle cycle
- Use a fabric shaver monthly during the first year to stay ahead of it
7. Bad Odors Lingering in the Sofa
Musty, pet-smell, smoke, or general stale odors that seem trapped inside the cushions and fabric. Odors penetrate deep into the foam and batting, meaning surface cleaning alone rarely solves the problem. A multi-layered approach is needed.
Common Causes
- Pet urine or accidents that soaked into the foam beneath the fabric
- Moisture from humidity or spills creating mildew inside cushions
- Smoke absorption (cigarettes, cooking, fireplaces) into porous foam
- Body oils, sweat, and skin cells accumulating over years without deep cleaning
Step-by-Step Fix
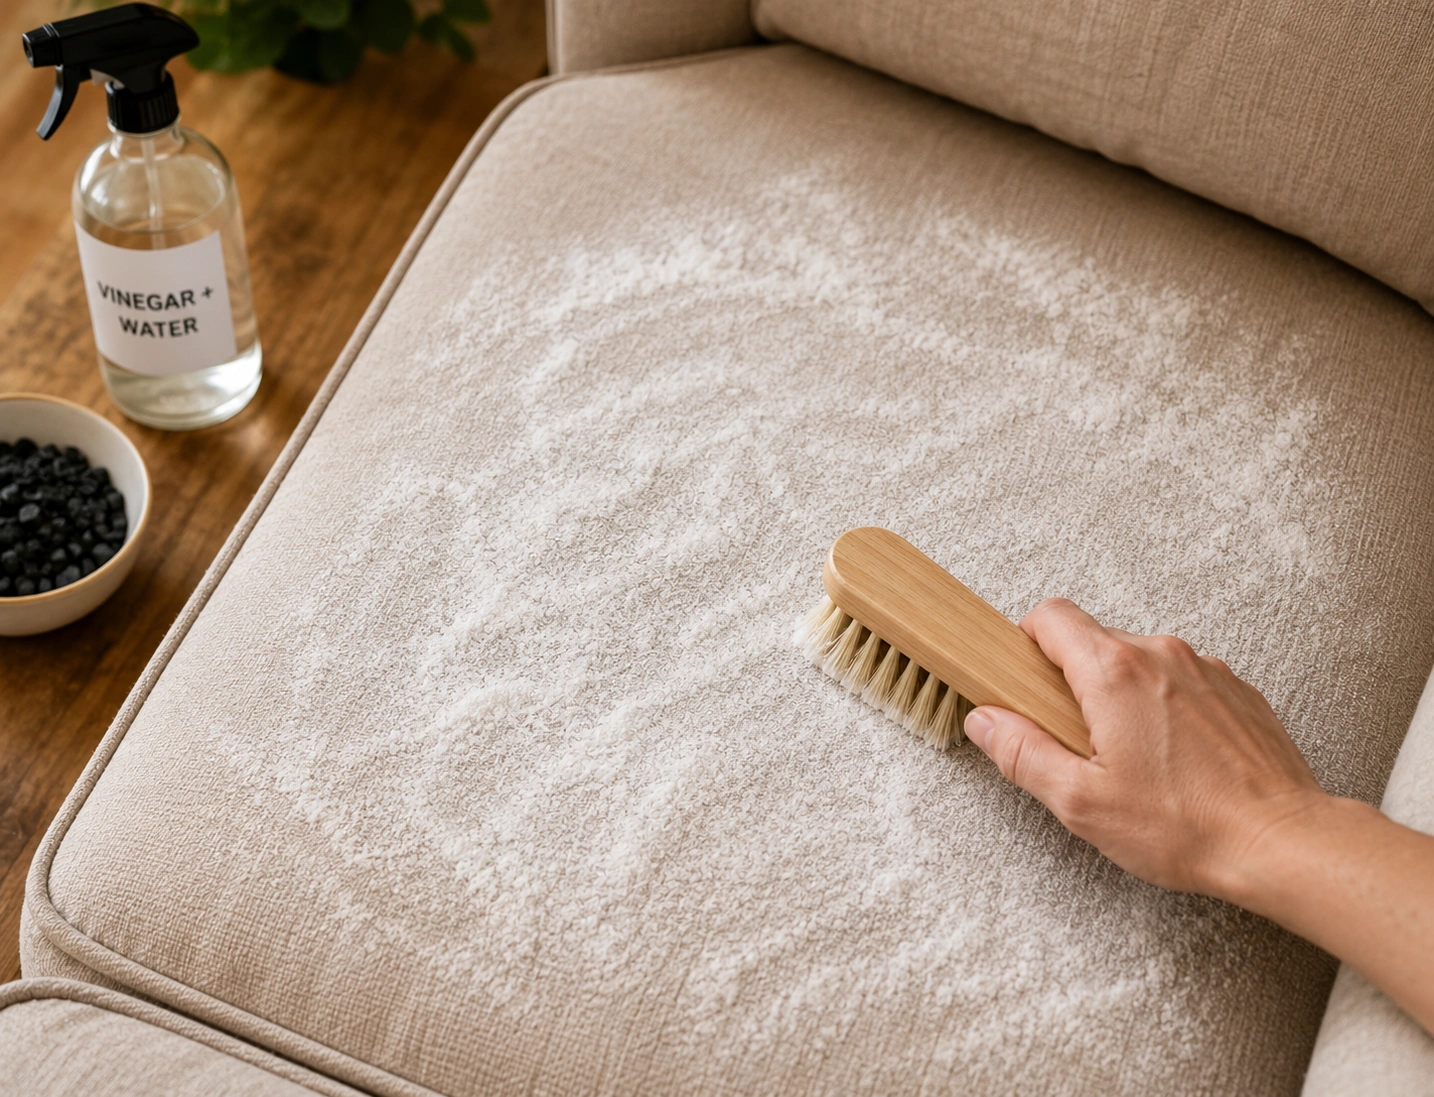
- Step 1 — Surface treatment: Remove all cushions and sprinkle baking soda generously over every fabric surface, including the base and back. Use a soft brush to work it into the fibers. Let it sit for at least 4 hours (overnight is best). Vacuum thoroughly with an upholstery attachment.
- Step 2 — White vinegar mist: Fill a spray bottle with equal parts white vinegar and water. Lightly mist the fabric (do not saturate). Vinegar neutralizes odor-causing bacteria. The vinegar smell will dissipate within a few hours.
- Step 3 — Deep foam treatment: If odors persist, the source is inside the cushions. Remove cushion covers and spray the foam inserts with an enzyme cleaner (specifically designed for pet odors). Enzymes break down odor molecules at a molecular level. Let the foam air-dry completely — this may take 24–48 hours.
- Step 4 — Sun exposure: Place cushion inserts in direct sunlight for several hours. UV rays naturally kill bacteria and mildew spores that cause musty smells.
- Step 5 — Activated charcoal: Place bowls of activated charcoal inside the sofa cavity (under loose cushions) for 48 hours to absorb residual odors from inside the frame area.
Prevention
- Treat pet accidents immediately — never let them soak in
- Vacuum sofa surfaces weekly to remove odor-causing particles
- Maintain indoor humidity between 30–50% to prevent mildew
- Use a washable sofa cover for households with pets or small children
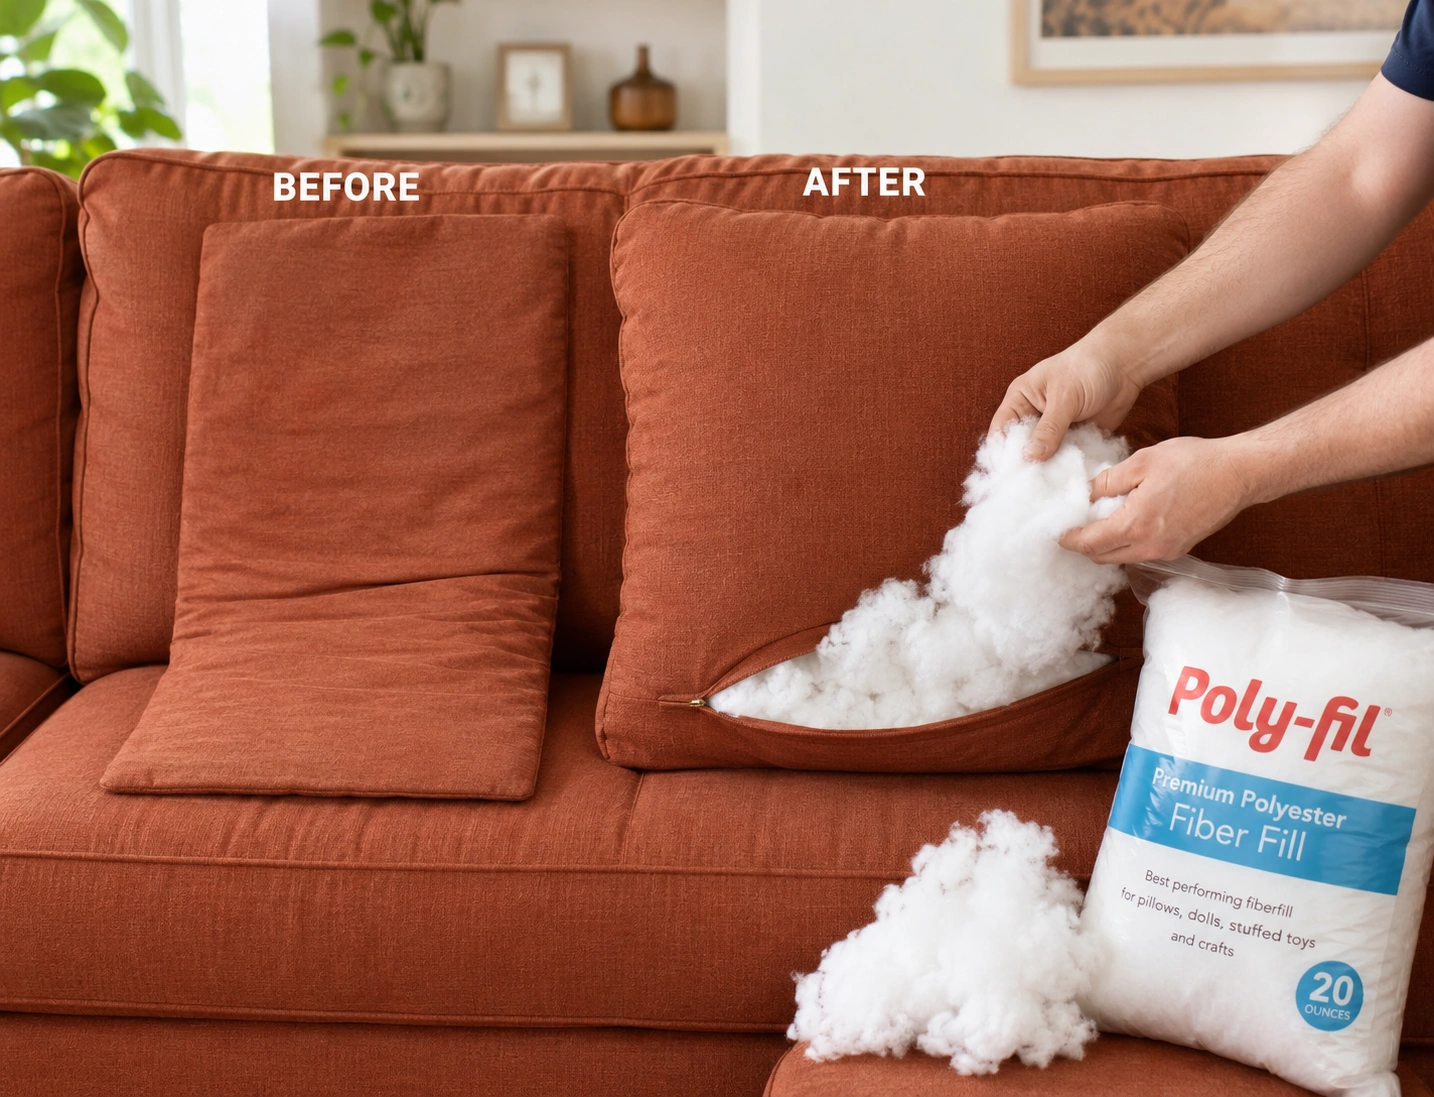
8. Flattened Back & Throw Cushions
Different from sagging (which involves structural failure), flattening is when cushion fill material simply compresses and loses its loft. Back pillows go flat, throw pillows lose their shape, and the sofa looks deflated and lifeless even though the seat may still be functional.
Common Causes
- Polyester fiberfill naturally compressing under constant pressure
- Down or feather fills shifting and clustering over time
- Lack of internal baffles in down-filled cushions (contents migrate to bottom)
- Cheap stuffing that lacks resilience and recovery properties
Step-by-Step Fix
- Quick fluff method: Remove the cushion, hold it by two corners, and firmly compress and release it several times. Then karate-chop the center and sides to redistribute the fill. This provides temporary volume that lasts a few days.
- For persistent flattening: Open the cushion cover and add polyester fiberfill stuffing. Pull the existing fill apart to break up compressed clumps, then evenly distribute the new fill throughout. This restores fullness for months.
- For down-filled cushions: Open the cover and manually redistribute the feathers. If the cushion lacks internal baffles (fabric walls that keep fill in place), consider having a seamstress add them — this prevents future migration.
- For cushions beyond recovery: Consider purchasing replacement cushion inserts. High-quality inserts can completely transform the look and comfort of an otherwise good sofa.
Prevention
- Fluff and reshape back cushions daily (takes 30 seconds)
- Rotate back cushions top-to-bottom if they're interchangeable
- Choose foam-wrapped fills over pure fiberfill for new purchases
9. Broken or Poking Springs
You feel a hard spot or sharp edge through the cushion, or the seat has an uneven "dead zone" where it doesn't spring back. Broken springs are a serious issue — they affect comfort, can damage the upholstery from inside, and indicate the suspension system is failing.

Common Causes
- Metal fatigue from years of repeated compression
- Rust or corrosion in humid environments (especially for basement sofas)
- Excessive weight or jumping on the sofa
- Low-gauge (thinner) wire springs used in budget constructions
Tools & Materials Needed
- Spring repair clips (available at upholstery supply stores)
- Pliers (needle-nose and regular)
- Heavy-duty wire cutter
- Upholstery twine and curved needle
- Work gloves (springs are sharp)
Step-by-Step Fix
- Remove the seat cushions and flip the sofa upside down. Remove the dust cover fabric.
- Identify the broken spring — it will typically be disconnected at one end, have a visible crack, or be noticeably misaligned compared to its neighbors.
- For a disconnected spring end: Use pliers to bend the spring end back into its original hook shape. Re-attach it to the frame or webbing using a spring clip.
- For a cracked/broken spring: Cut the broken section out with wire cutters. Use a spring repair clip to bridge the gap, connecting the two remaining pieces. This is a temporary fix — the spring won't have full original tension.
- For a spring that's completely destroyed: Replace it with an identical spring from an upholstery supplier. Match the coil diameter, wire gauge, and height exactly.
- After repair, tie the springs together with upholstery twine in a grid pattern (8-way hand-tied is the gold standard) to ensure even support and prevent individual spring stress.
- Replace the dust cover and test the seat thoroughly before regular use.
Prevention
- Never stand, jump, or place heavy objects on the sofa seat
- Keep sofas in climate-controlled areas — avoid placing them in damp basements without dehumidifiers
- Choose sofas with 8-way hand-tied springs or high-quality sinuous springs for maximum durability
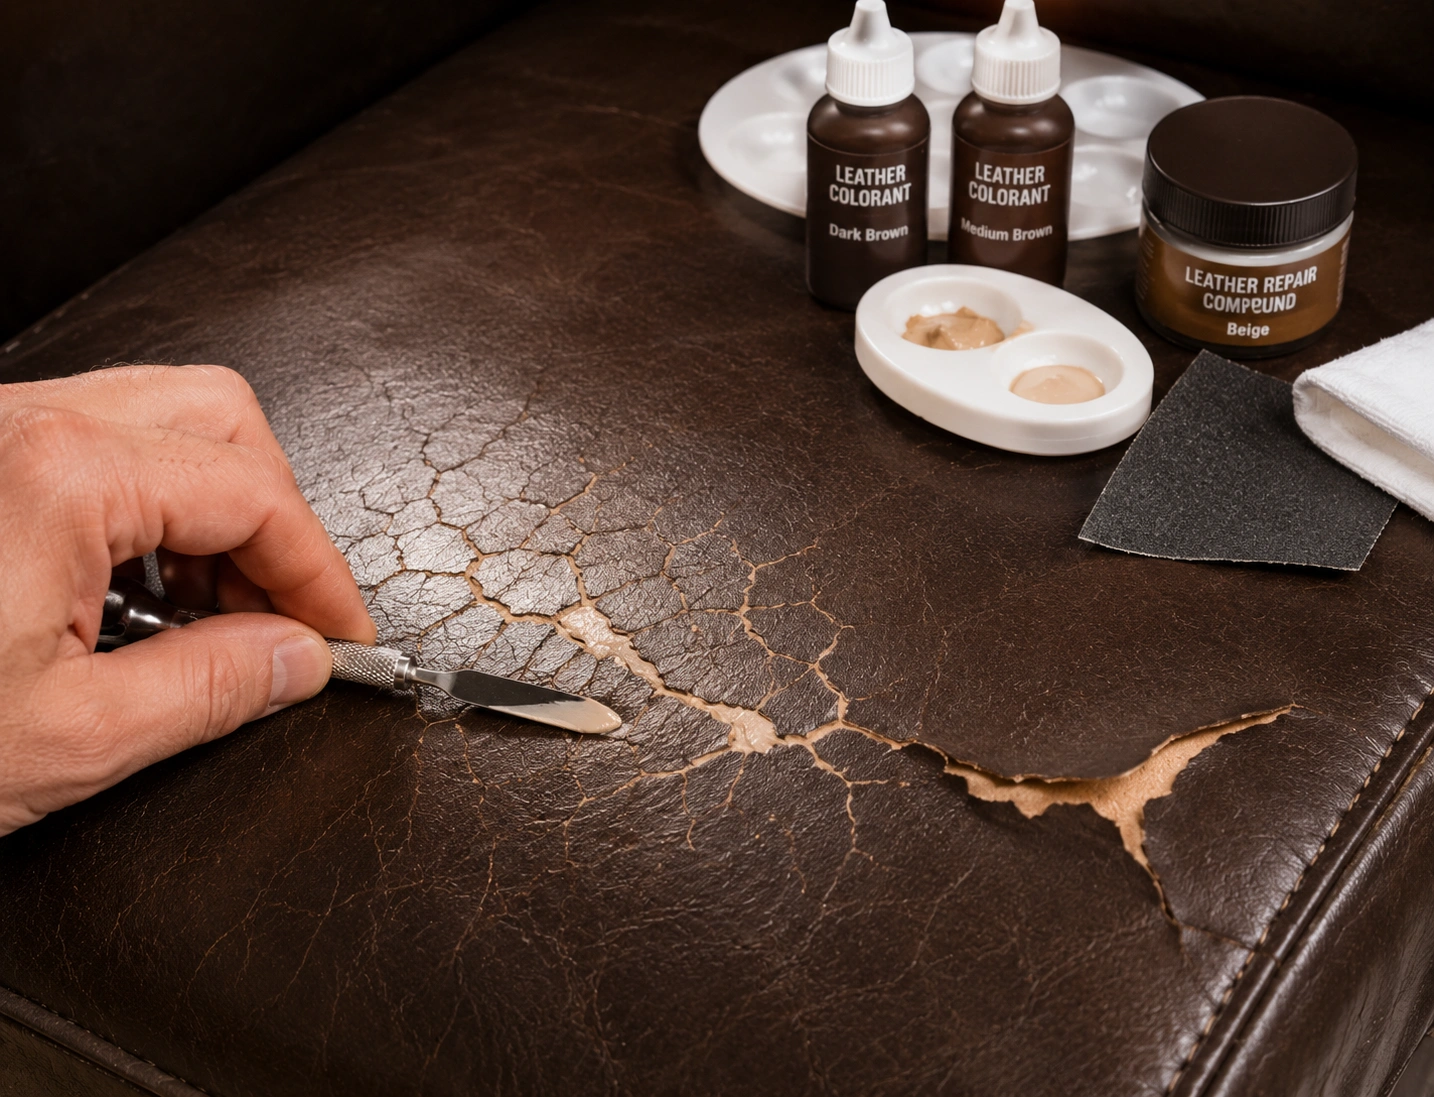
10. Leather Cracking & Peeling
Leather develops fine cracks that deepen over time, or the surface coating begins to flake off in patches — a problem especially common with bonded leather and lower-grade leather. Understanding whether you have genuine leather or bonded leather determines whether repair is worthwhile.
Common Causes
- Dryness — leather loses its natural oils without regular conditioning
- Direct sunlight and heat exposure causing the material to dry and crack
- Bonded leather's polyurethane coating delaminating from the backing (this is irreversible)
- Using harsh chemical cleaners that strip the leather's protective finish
- Low-quality leather grades that lack the natural durability of full-grain or top-grain leather
Tools & Materials Needed
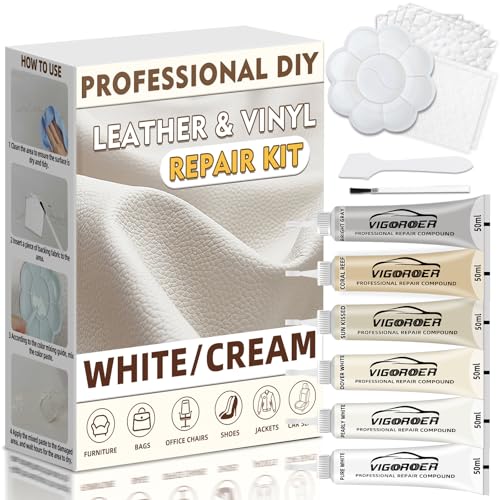
- Leather repair kit (includes compound, colorant, and finish)
- Leather conditioner
- Fine-grit sandpaper (600–1000 grit)
- Cotton swabs and clean cloths
Step-by-Step Fix
- Identify your leather type first. Genuine leather (full-grain or top-grain) can be repaired effectively. Bonded leather that is peeling cannot be truly repaired — the coating will continue to flake. If you have bonded leather with widespread peeling, a sofa cover or replacement is the realistic solution.
- For genuine leather cracks: Lightly sand the cracked area with 600-grit sandpaper to smooth rough edges. Wipe clean with a damp cloth and let dry completely.
- Apply leather repair compound to the cracks using a putty knife or the applicator included in the kit. Fill the crack slightly above the surface level — it will shrink as it dries.
- Let the compound dry fully (follow kit instructions — usually 2–4 hours). Lightly sand smooth.
- Apply the colorant from the kit, matching your leather's shade. Multiple thin coats give better results than one thick coat. Let each coat dry before applying the next.
- Finish with the protective topcoat from the kit. Once fully cured (24 hours), apply leather conditioner to restore suppleness.
Prevention
- Condition leather every 3–6 months without exception
- Keep leather sofas away from windows, heating vents, and direct sunlight
- Clean spills immediately with a damp cloth — never use harsh chemicals
- Invest in top-grain or full-grain leather rather than bonded leather for new purchases
When to Fix vs. When to Replace Your Sofa
Not every sofa problem is worth fixing. Use this decision framework to determine whether a repair is a smart investment or whether it's time to shop for a replacement.
✓ Worth Fixing
- Sofa is less than 7 years old with a solid hardwood frame
- Only one or two problems exist (e.g., sagging cushions only)
- You spent over $1,000 on the sofa originally
- The frame is structurally sound with no cracks or warping
- Replacement parts cost less than 30% of a new sofa
- The style still fits your room and you genuinely like it
✗ Time to Replace
- Multiple simultaneous problems (springs + frame + cushions)
- Frame is cracked, split, or warped
- Bonded leather with widespread peeling
- Sofa has a softwood or particle board frame
- Repair costs exceed 50% of a quality replacement
- The sofa no longer supports your body properly
Essential Sofa Maintenance Checklist
Following this simple routine prevents most of the 10 problems covered in this guide. Consistency matters more than effort — these small habits add years to your sofa's life.
Weekly Tasks
Vacuum all surfaces with upholstery attachment. Fluff and reshape back cushions. Check for new stains and treat immediately.
Monthly Tasks
Rotate and flip seat cushions. Wipe down leather sofas with a damp cloth. Run a fabric shaver over pilling-prone areas.
Every 3–6 Months
Condition leather sofas. Apply fabric protection spray. Tighten all visible frame bolts and leg fasteners. Inspect for early wear signs.
Yearly Tasks
Professional deep cleaning for fabric sofas. Inspect springs and frame underneath. Check for loose joints. Apply UV protectant if near windows.
Frequently Asked Questions
Can I fix a sagging sofa without replacing the foam?
Yes, temporarily. You can place a piece of plywood cut to size under the cushion for immediate support. Another option is to add a dense foam topper on top of the existing foam. However, these are temporary solutions — the underlying foam will continue to degrade. For a lasting fix, replacing the foam insert is the most effective approach.
Why does my new sofa already have problems?
If problems appear within the first year, it typically points to low construction quality. Common culprits include low-density foam (under 1.8 lb), softwood frames, thin-gauge springs, and cheap bonded leather. This is why understanding how to choose a sofa before purchasing is so important — the price tag alone doesn't tell you what's inside.
Is it worth hiring a professional upholsterer?
For isolated problems like torn upholstery on a high-quality frame, yes — professional reupholstery typically costs $500–$1,500 and can give a premium sofa another 10–15 years of life. But if the frame, springs, and cushions all need work, the total cost often approaches or exceeds the price of a new sofa. As a general rule, reupholstery is worth it if the frame is kiln-dried hardwood and in excellent condition.
How long should a good quality sofa last?
A well-constructed sofa with a hardwood frame, high-density foam, and quality suspension should last 10–15 years with proper maintenance. Budget sofas with softwood frames and low-density foam typically last 3–5 years. The balance between comfort and durability depends on construction quality — not price alone. Check our guide on price vs quality to understand what you're actually paying for.
Can I prevent all of these problems with a sofa cover?
A sofa cover effectively prevents stains, fabric pilling wear, UV damage, and pet claws from reaching the actual upholstery. However, it cannot prevent internal problems like sagging cushions, broken springs, squeaky frames, or bad odors that develop inside the cushion foam. Think of a cover as external protection — you still need internal maintenance for the suspension and cushion systems.
Are secondhand sofas worth buying if they have problems?
It depends on which problems they have. A secondhand sofa with a solid hardwood frame but sagging cushions is an excellent deal — new foam costs $50–$150 and makes the sofa like new. However, a secondhand sofa with frame cracks or broken springs is usually not worth the repair investment. Read our secondhand vs new sofa comparison for a detailed buying checklist.
Want a complete maintenance routine? Our comprehensive sofa cleaning and maintenance guide covers everything from daily care to annual deep cleaning for every fabric type. Pair it with this troubleshooting guide and your sofa will outlast any sofa in your neighborhood.